AppCode’s File and Code templates are generated using Velocity, a Java-based template engine. Taking a few minutes to tweak the existing templates orr create new ones can end up saving you a ton of time down the line.
What’s a template engine?
A template processor (also known as a template engine or template parser) is software designed to combine one or more templates with a data model to produce one or more result documents. (Template processor)
You can find the existing templates in Preferences > Editor > File and Code templates. The data model is a set of predefined template variables:
${PROJECT_NAME} - the name of the current project.
${NAME} - the name of the new file which you specify in the New File dialog box during the file creation.
${USER} - the login name of the current user.
${DATE} - the current system date.
${TIME} - the current system time.
${YEAR} - the current year.
${MONTH} - the current month.
${DAY} - the current day of the month.
${HOUR} - the current hour.
${MINUTE} - the current minute.
${PRODUCT_NAME} - the name of the IDE in which the file will be created.
${MONTH_NAME_SHORT} - the first 3 letters of the month name. Example: Jan, Feb, etc.
${MONTH_NAME_FULL} - full name of a month. Example: January, February, etc.
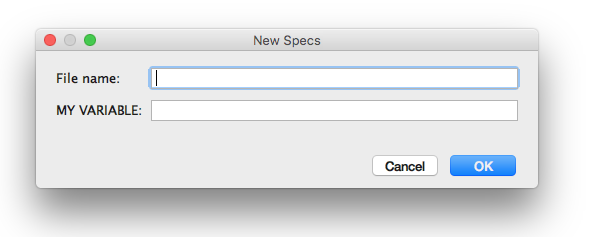
You can also add your own variables. They’ll be added to the file creation prompt:
Combining the template with the data model is actually very easy. A good example I came across is the creation of test files. Let’s say you want to write tests for MyClass, you need to create a MyClassSpec.h file. A good starting point for that file could be the following:
The problem is that it’s not possible to generate this file using only the predefined template variables, because ${NAME} will equal MyClassSpecs and not MyClass. You can either add another variable or use Velocity to get the desired result. We’ll look into the latter.
It’s possible to execute Java code in velocity templates, which means that we can use Java’s String methods to manipulate the file name and extract the base class’ name:
In the end, this is what the Spec template looks like:
After updating my mac to El Capitan, I was about to re-install my habitual window manager (Divvy), but because it’s Sunday, and the grass is always greener elsewhere, I started looking for an alternative.
The usual suspect showed up: Moom. I used it before but as with Divvy, there was something I didn’t quite like with it.
Mjolnir is an OS X app that lets you automate common tasks using the language Lua.
So, yeah. Something even less user friendly than a regular window manager, but I haven’t done any Lua yet and I can sync the config across multiple machines: SOLD. To top it off, the logo is awesome.
Now the fun starts, let’s create ~/.mjolnir/init.lua and add a few window resize shortcuts:
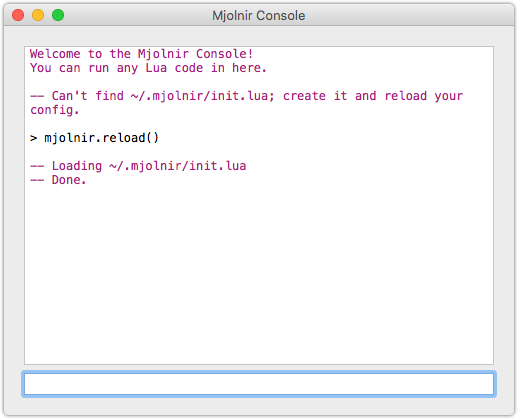
While writing the scripts, use the Mjolnir console to reload the file. Just type mjolnir.reload():
You can install Mjolnir’s documentation in Dash. Just search for it in the User contributed section.
The above script is very basic and there’s a lot of repetition. Since we’re basically using a grid based layout, there’s already a module for that: mjolnir.bg.grid
The program then becomes simpler and shorter:
Happy scripting!
If you want to learn more, I can recommend this blog post: Using Mjolnir
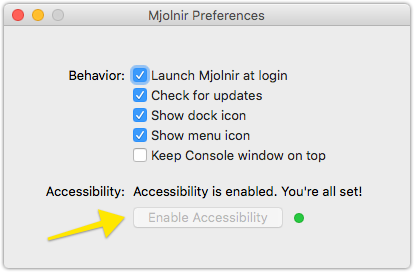
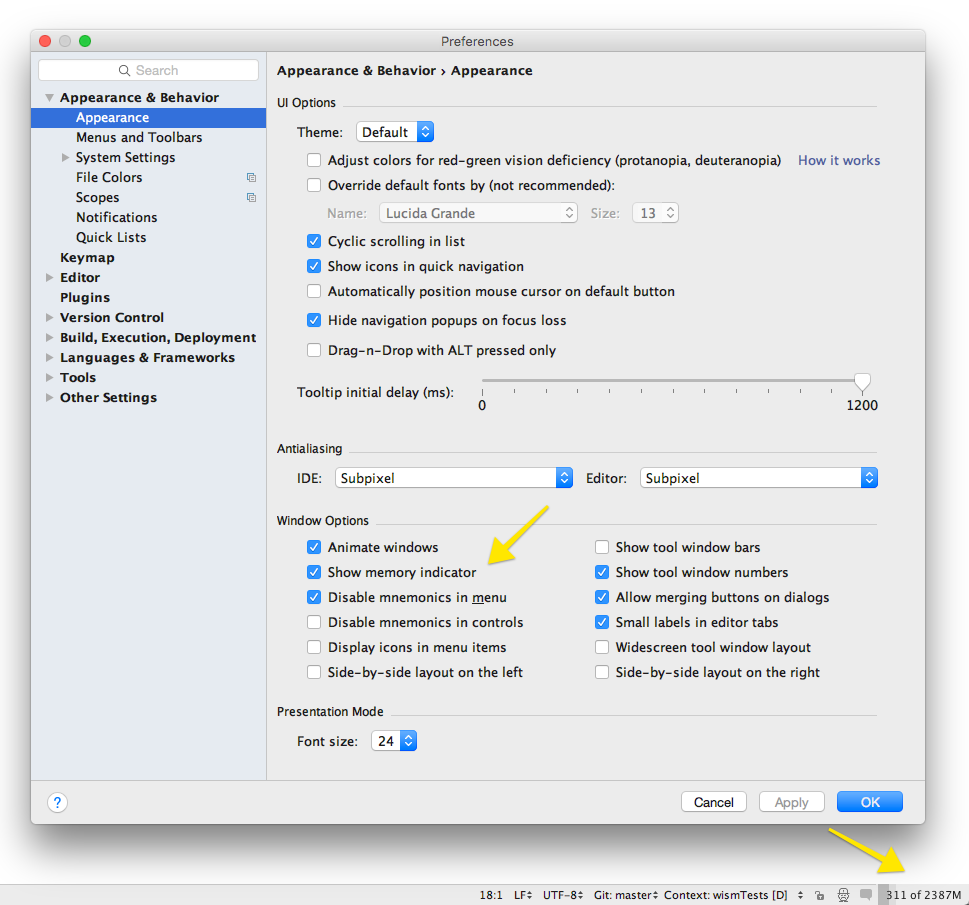
I love AppCode, but sometimes it can get excruciatingly slow when working on large projects. A good thing to check in those cases is the memory usage. Here’s how to access it:
You’ll now have a little memory indicator in the bottom right toolbar of the IDE. If you see that the memory fills up instantly when opening your project, then maybe it’s time to increase it.
AppCode runs on the JVM, and you can change the JVM parameters. First, copy the default launch options to AppCode’s preferences directory: